Description
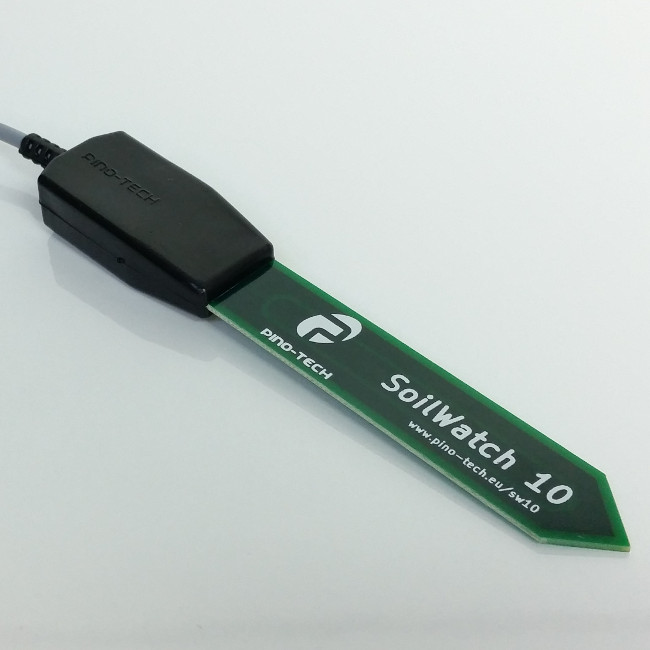
SoilWatch 10
The ultimate soil moisture sensor for accurate and reliable measurements. Say goodbye to inferior resistive sensors found elsewhere. Our innovative design features no exposed electrodes, eliminating corrosion issues common in other sensors. With minimal drift over time or in response to temperature changes, SoilWatch 10 delivers consistent readings regardless of voltage supply. Its waterproof and weatherproof construction allows for long-term burial in soil without compromise. Experience unparalleled durability and precision with SoilWatch 10.
Please Note: Only the sensor is included in this sale. Any additional accessories or components shown in images or descriptions are not included.
Features:
- Accurate
- Easy to use
- 75Mhz capacitive sensor
- Waterproof and weatherproof proof
- It will last a lot longer than resistive soil moisture sensors
Applications:
- Irrigation management
- Soil moisture monitoring
- IoT Devices
Specification:
Voltage: 3.1 – 5.0V (absolute maximum 5.5V)
Output: 0 – 3.0V (approximately)
Current: ~15mA
Startup time: <25ms
Operating temperature: -20°C to 80°C (readings below 0°C are meaningless)
Dimensions: 170x25x25mm
Weight: ~52g, ~120g, ~210g, ~400g
Cable: 1.5m, 5m, 10m, 20m
Connections:
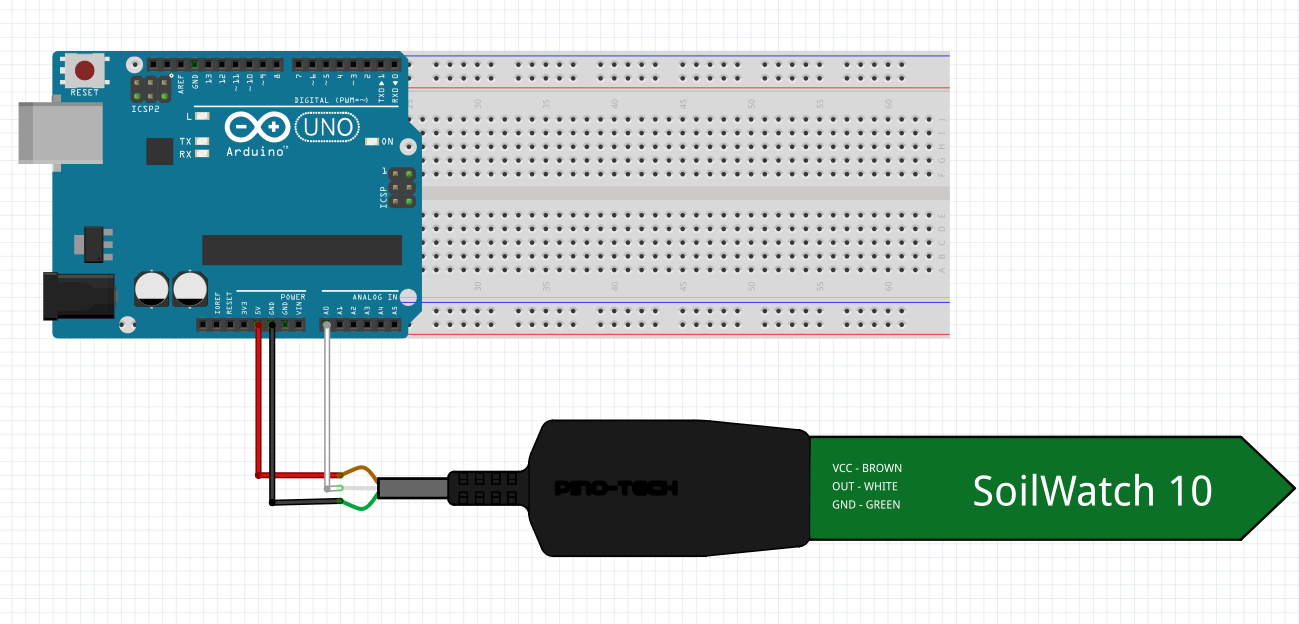
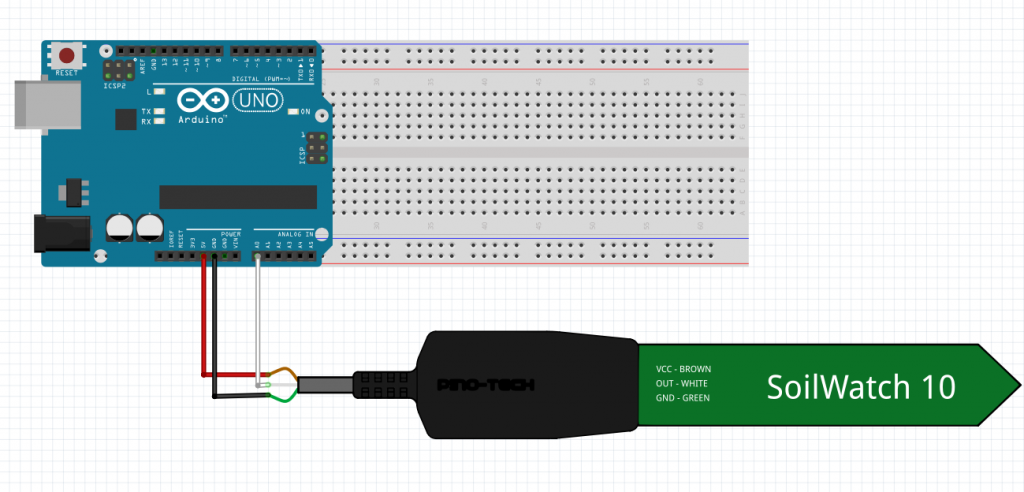
- Brown – VCC (+)
- Green – VDD (-)
- White – Output
Raspberry Pi
Experience the power of SoilWatch 10 alongside your Raspberry Pi with ease, thanks to its compatibility with external analog-to-digital converters (ADC). Simply integrate popular ADC options such as ADS1115 or MCP3008 breakout boards for seamless connectivity. Unlock the full potential of your soil moisture monitoring with SoilWatch 10 and Raspberry Pi, a dynamic duo for data-driven gardening and agriculture.
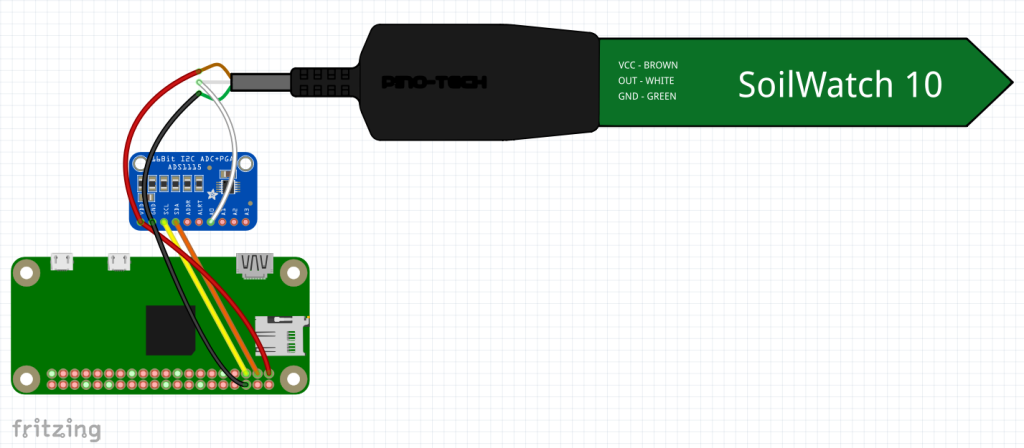
Python script for use with Raspberry Pi + ADS1115
#
# PINO-TECH - SoilWatch 10
#  Raspberry Pi + ADS1115
#
# To run this script the ADS1115 library needs to be installed
# Use the command below to install the library
# sudo pip3 install adafruit-circuitpython-ads1x15
#

import time
import board
import busio
import adafruit_ads1x15.ads1115 as ADS
from adafruit_ads1x15.analog_in import AnalogIn

i2cbus = busio.I2C(board.SCL, board.SDA)
ads = ADS.ADS1115(i2cbus)

# Set analog chanel
ch0 = AnalogIn(ads, ADS.P0)
#ch1 = AnalogIn(ads, ADS.P1)

while True:
    #calculate the Volumetric Water Content
    vwc = 2.8432*ch0.voltage**3 - 9.1993*ch0.voltage**2 + 20.2553*ch0.voltage - 4.1882
    #round vwc to 2 decimals
    vwc = round(vwc, 2)
    print("Voltage: ", round(ch0.voltage, 3), "%VWC: ", vwc)
    time.sleep(0.3)
ESPHome + Home Assistant
Connect SoilWatch 10 to your Home Assistant system using ESPHome for easy integration. Monitor soil moisture levels effortlessly and add a practical touch to your gardening setup. Enjoy the convenience of technology and nature working together seamlessly with SoilWatch 10 and Home Assistant.
Sample yaml configuration file – sensor section only
sensor:
  # SoilWatch 10 - Pino-Tech - Soil Moisture Sensor 1
  - platform: adc
    pin:
      number: GPIO36 #change to your GPIO (GPIO36 - VP pin on ESP32 DEVKIT V1)
      allow_other_uses: true
    name: "Soil humidity"
    icon: "mdi:water"
    attenuation: 11db
    update_interval: 0.1s
    unit_of_measurement: '%VWC'
    filters:
    - calibrate_polynomial:
        degree: 2
        datapoints:
        - 0.2 -> -0.48
        - 0.6 -> 5.27
        - 1.0 -> 9.71
        - 1.4 -> 13.94
        - 1.8 -> 19.04
        - 2.2 -> 26.12
        - 2.6 -> 36.26
        - 3.0 -> 50.55
    # updates sent = (update_interval * send_every) 0.1s * 100 = 10s
    - sliding_window_moving_average:
        window_size: 100
        send_every: 100
        send_first_at: 100
Made in POLAND!
Our sensor is being assembled and tested in-house. This allows us to have full control
over the quality of our product.
Download:
Datasheet: SoilWatch10
Arduino Examples:
Volumetric Water Content:
/*
  SoilWatch 10 soil moisture sensor example - VWC

  Reads analog value of soil moisture sensor and displays it
  on the serial port.

  The circuit:
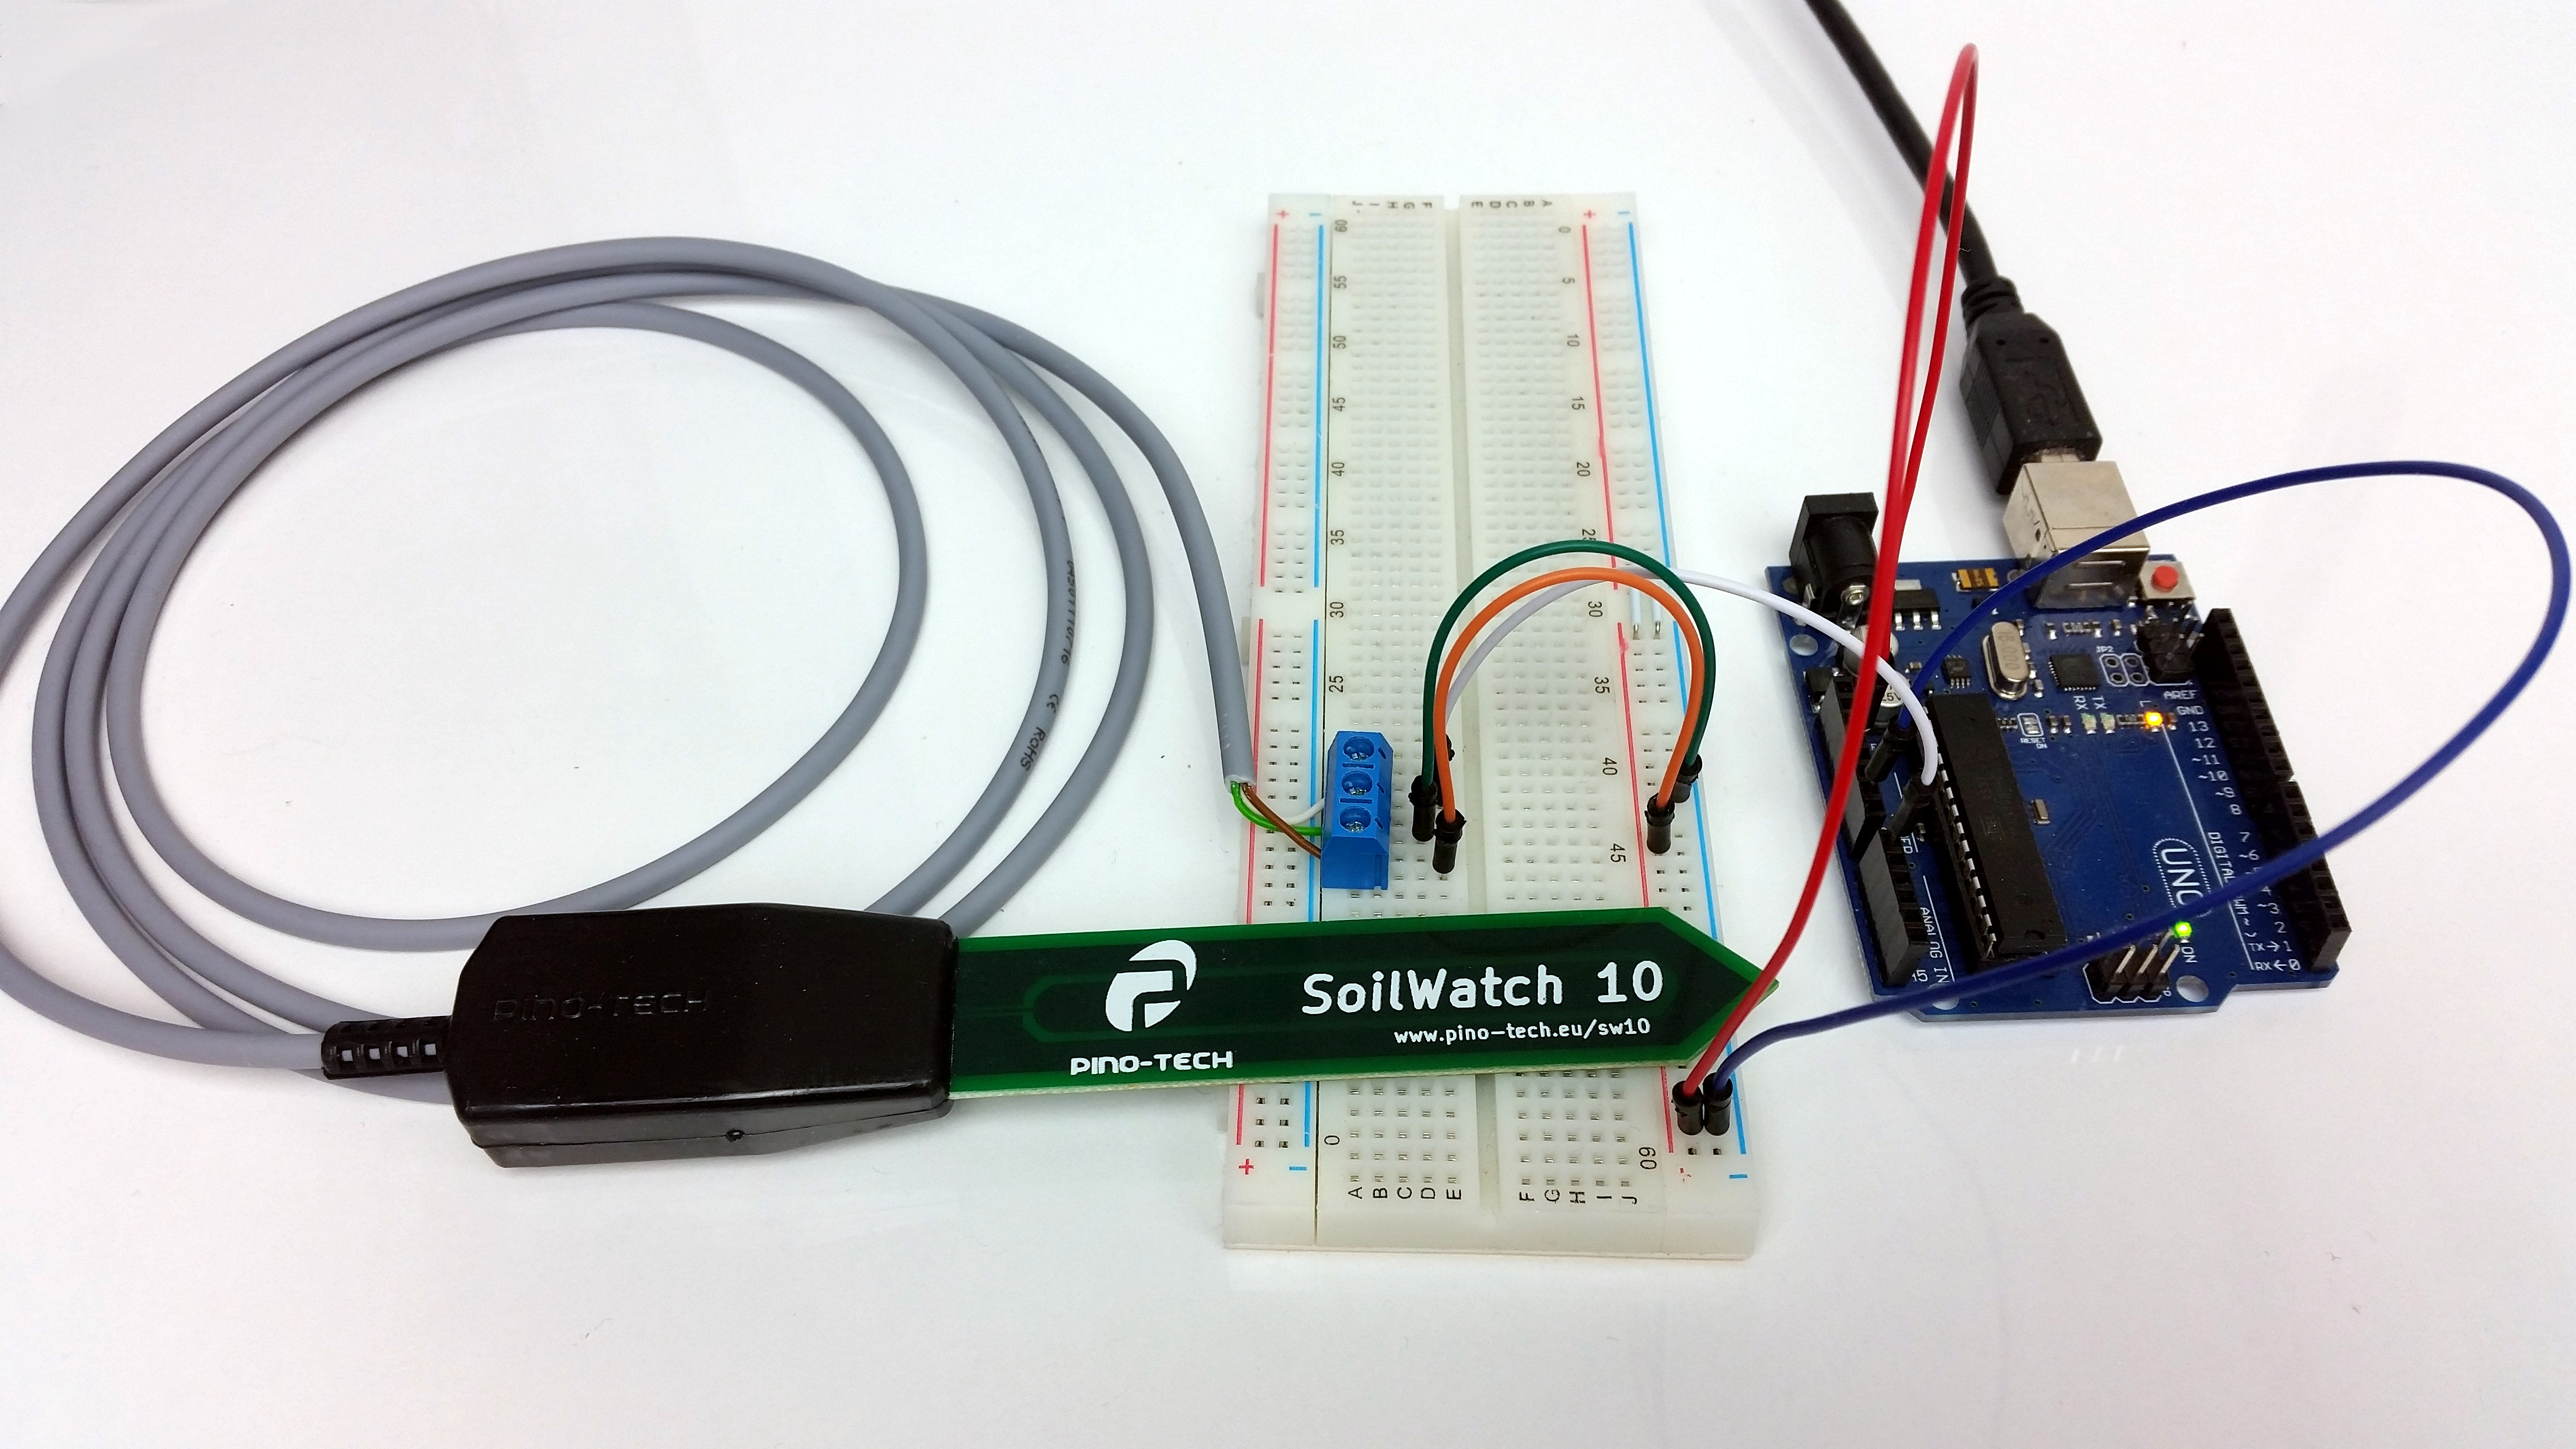
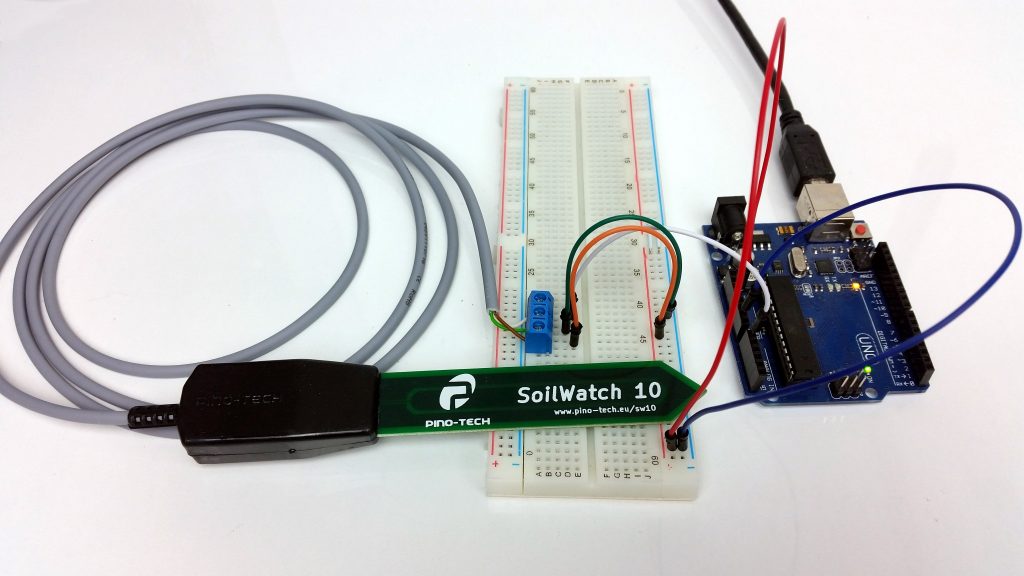
  Sensor output (white wire) connect to Analog A0 on Arduino.
  Connect VCC (brown wire) to 3.3V or 5V on Arduino (3.3V gives more stable readings)
  Connect GND (green wire) to GND on Arduino.

  created 30 Aug. 2017
  last updated 1 Jun 2021
  by Piotr Trembecki
  https://pino-tech.eu/sw10

  This example code is in the public domain.

*/

/*
******** SETUP ********

  For 1.1V version set is1V1Output to true. The usual maxADC value will be around 1000.
  For 3V version set is1V1Output to false. The usual maxADC value will be around 600.

***********************
*/
const int analogInPin = A0;           // Analog input pin that the sensor output is attached to (white wire)
bool is1V1Output = false;             // set true if 1.1V output sensor is used for 3V set to false
float refVoltage = 5;                 // set reference voltage - by default Arduino supply voltage (UNO - 5V)

int rawValue;
float voltage, vwcValue;

void setup() {
  // initialize serial communications at 9600 bps:
  Serial.begin(9600);

  if (is1V1Output == true)
  {
    analogReference(INTERNAL); //set ADC reference to internal 1.1V
    refVoltage = 1.1;
  }
}

void loop() {
  // read the moisture value:
  rawValue = analogRead(analogInPin);

  voltage = rawValue * refVoltage / 1023.0f;

  // print ADC results to the serial monitor:
  Serial.print("RAW ADC = " );
  Serial.print(rawValue);
  Serial.print(", " );

  // print mapped results to the serial monitor:
  Serial.print("Voltage = " );
  Serial.print(voltage);
  Serial.print(", " );

  if (is1V1Output == true)
  {
    //multiply the voltage to mach 3V version VWC equation of the sensor
    voltage = voltage * 2.94;

  }

  //VWC equation is suitable for most mineral soils - most mineral soils will saturate around 35-50% VWC
  vwcValue = (2.8432f * voltage * voltage * voltage) - (9.1993f * voltage * voltage) + (20.2553f * voltage) - 4.1882f;


  // print VWC results to the serial monitor:
  Serial.print("Moisture VWC [%] = " );
  Serial.println(vwcValue);

  // wait 500 milliseconds before the next loop
  delay(500);
}
Simple moisture example:
/*
  SoilWatch 10 soil moisture sensor example - Simple

  Reads analog value of soil moisture sensor and displays it
  on the serial port.

  The circuit:
  Sensor output (white wire) connect to Analog A0 on Arduino.
  Connect VCC (brown wire) to 3.3V or 5V on Arduino (3.3V gives more stable readings)
  Connect GND (green wire) to GND on Arduino.

  created 30 Aug. 2017
  last updated 9 Feb 2018
  by Piotr Trembecki
  https://pino-tech.eu/sw10

  This example code is in the public domain.

*/

/*
******** SETUP ********

  For 1.1V version set is1V1Output to true. The usual maxADC value will be around 1000.
  For 3V version set is1V1Output to false. The usual maxADC value will be around 600.

***********************
*/
const int analogInPin = A0;           // Analog input pin that the sensor output is attached to (white wire)
int minADC = 0;                       // replace with min ADC value read in air
int maxADC = 600;                     // replace with max ADC value read fully submerged in water
bool is1V1Output = false;             // set true if 1.1V output sensor is used for 3V set to false


int moistureValue, mappedValue;

void setup() {
  // initialize serial communications at 9600 bps:
  Serial.begin(9600);

  if (is1V1Output == true)
    analogReference(INTERNAL); //set ADC reference to internal 1.1V
}

void loop() {
  // read the moisture value:
  moistureValue = analogRead(analogInPin);

  // print ADC results to the serial monitor:
  Serial.print("ADC = " );
  Serial.print(moistureValue);
  Serial.print(", " );

  mappedValue = map(moistureValue, minADC, maxADC, 0, 100);

  // print mapped results to the serial monitor:
  Serial.print("Moisture value = " );
  Serial.println(mappedValue);

  // wait 500 milliseconds before the next loop
  delay(500);
}


Adi Shalev (verified owner) –
Malfunctions after a few weeks, very bad experience.
Piotr Trembecki (store manager) –
We are sorry that your sensors failed. It does happen from time to time. We replace faulty sensors promptly. Please contact us to arrange the replacement.